understanding safe & proper use of the Unisit
As with any activity with a horse, "safety first" should be your guiding motto. Below are some Do's and Don'ts to follow when riding with the Unisit.
Do's for training with the Unisit:
Dont's of training with the Unisit:
Do's for training with the Unisit:
- Use Unisit under supervision of a professional. We encourage instructors to be familiar with riding in the Unisit prior to using it with their students.
- Use Unisit with a rider that can walk, trot, and canter independently.
- Use Unisit in a controlled, enclosed, and properly groomed arena.
- Begin using Unisit only when horse and rider are thoroughly warmed up with the muscles loose and supple.
- Start with short sessions in the Unisit (5 mins.) and gradually increase the duration, to prevent discomfort to the horse or rider, and to allow the musculature to adapt to the new position.
- Ride with engaged abdominal muscles and draw back the lower ribs as upper ribs come forward over the pubic bone.
- Draw the seat bones toward the front of the saddle as much as is comfortable.
Dont's of training with the Unisit:
- Use Unisit alone with no supervision.
- Use Unisit on a green, disobedient, spooky, or unbalanced horse.
- Use Unisit on a poorly fitted saddle.
- Use Unisit with a beginner rider who is unable to confidently walk, trot, and canter independently.
- Use Unisit in an open area with uneven, rocky, or unsafe footing.
- Fasten the strap so tightly that it causes any bruising or discomfort; or so loosely it is ineffective.
- Use Unisit on a cold-backed horse or a tense rider who has not sufficiently warmed up.
- Assume upon first use that the rider and horse are physically ready to strap in for an extended amount of time.
- Ride with collapsed abdominal muscles.
- Allow the back to hollow with the seat bones pointing toward the back of the saddle.
- Ride with spurs if there is any instability in your lower leg.
- Let any part of the body become improperly aligned or unevenly weighted
Step-by-step installation instructions

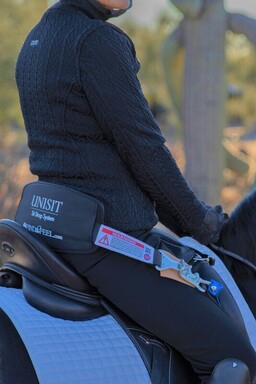
STEP 1:
Place the strap around the rider's back with the padded back support against the lower back and both "ends" of the strap resting on either side of the rider and the horse.
Place the strap around the rider's back with the padded back support against the lower back and both "ends" of the strap resting on either side of the rider and the horse.
STEP 2:
Allow the ends of the strap to hang over the rider's thighs on both sides. Place the metal safety release buckle face-up on the rider's right thigh.
Allow the ends of the strap to hang over the rider's thighs on both sides. Place the metal safety release buckle face-up on the rider's right thigh.
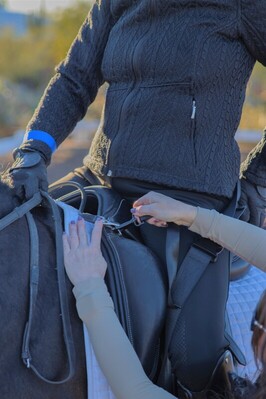
STEP 3:
Attach the right swivel snap hook of the strap to the small D-ring on the saddle.
Attach the right swivel snap hook of the strap to the small D-ring on the saddle.
STEP 4:
Place the rider's right wrist through the wrist strap loop. There are two snap options for adjustment. The smaller adjustment is appropriate for most riders, and another if you have larger hands or are wearing aheavy winter jacket or gloves
Place the rider's right wrist through the wrist strap loop. There are two snap options for adjustment. The smaller adjustment is appropriate for most riders, and another if you have larger hands or are wearing aheavy winter jacket or gloves
STEP 5:
Allow the strap to run down and hang along the inside of the rider's thigh (it will turn).
Allow the strap to run down and hang along the inside of the rider's thigh (it will turn).
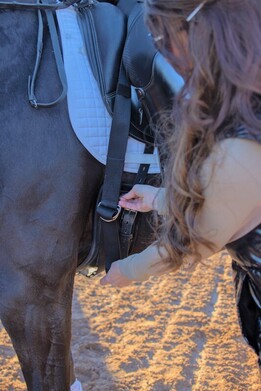
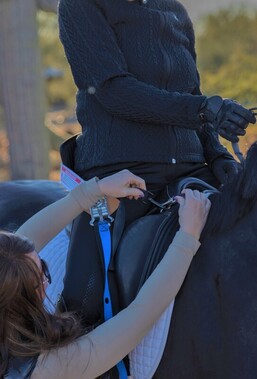
STEP 6:
From the other side, reach under the horse and attach the straps together using the D-rings. Tighten snugly. Use the keeper to hold any excess strapping.
From the other side, reach under the horse and attach the straps together using the D-rings. Tighten snugly. Use the keeper to hold any excess strapping.
STEP 7:
Attach the left swivel snap hook of the strap to the small D-ring on the saddle.
Attach the left swivel snap hook of the strap to the small D-ring on the saddle.
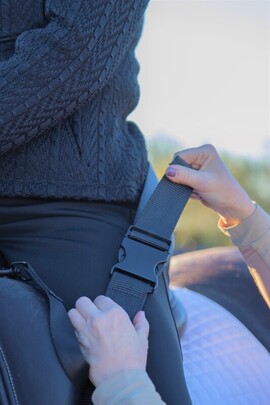
STEP 8:
Take the long strap under the horse, over the girth, (be sure no pinching occurs) and run the small rectangle buckle through the large one hanging down from the left side of the saddle.
Take the long strap under the horse, over the girth, (be sure no pinching occurs) and run the small rectangle buckle through the large one hanging down from the left side of the saddle.
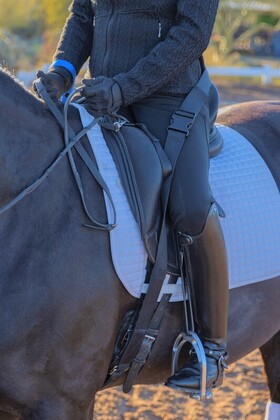
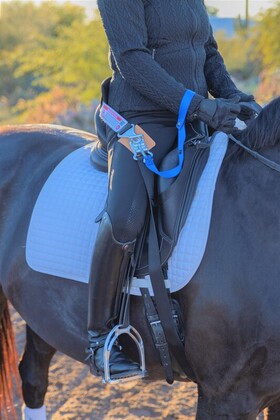
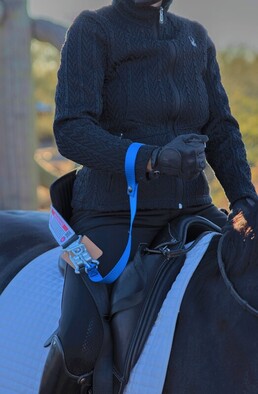
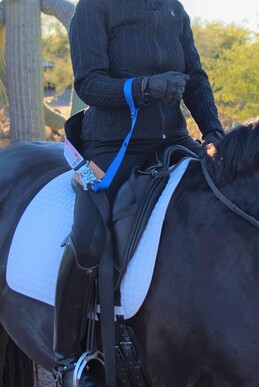
Finished Installation:
This is what the properly attached Unisit will look like from both sides of the horse and rider.
This is what the properly attached Unisit will look like from both sides of the horse and rider.